How to Upgrade, Downgrade, or Cancel QuotaGuard on Heroku
How to Upgrade or Downgrade QuotaGuard on Heroku
To upgrade or downgrade your QuotaGuard Static or QuotaGuard Shield subscription plan, you can follow these simple steps.
Note: Changing your plan does not repeat not change your IP addresses or cause any service interruptions.
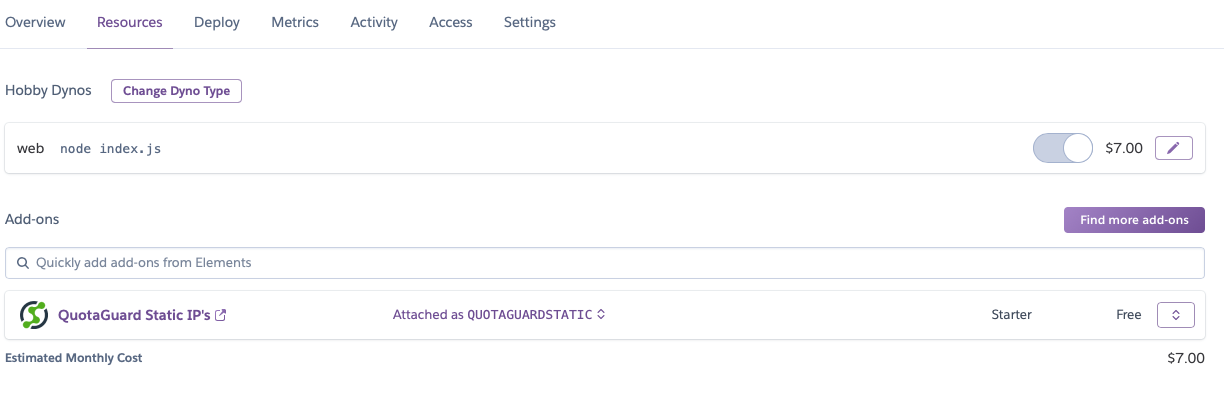
Step 1. Log into your Heroku Dashboard and go to the Resources page where you can click on the QuotaGuard Static or QuotaGuard Shield Add-On so you see the screen below.
Step 2. On the right side of the screen, click the dropbox box so you see the “Modify Plan” option.
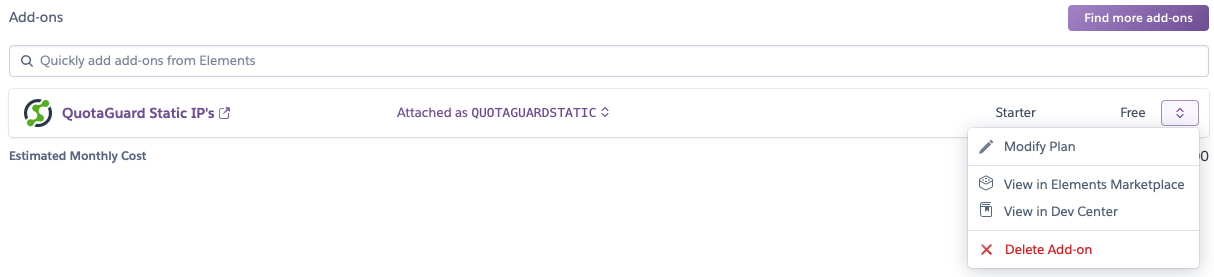
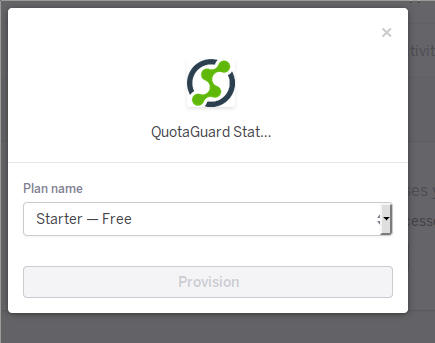
Step 3. Select the appropriate plan for your traffic usage and click “Provision”.
Now your QuotaGuard Static application should be updated on Heroku and your service should experience no interruptions.
How to Cancel QuotaGuard on Heroku
Canceling with QuotaGuard on Heroku is a very straight forward process. It’s very similar to the above process for upgrading or downgrading the plan.
Borrowing from Heroku’s own directions:
Open the Heroku Dashboard. On the app’s Resources tab, scroll down to the Add-ons section.
On the rightmost side of the add-on listing, click the actions button (three vertically-stacked dots) to open the menu.
From this menu, you can remove, upgrade, or downgrade the add-on.
Heroku keeps a current document on how to Remove, Downgrade, or Upgrade Add-on’s that should have all the relevant and current steps to work with your Add-on’s, like QuotaGuard.
But, if you have any issues or questions with regard to Heroku plans, please feel free to write to us at Support any time.