How to Add a Custom Domain for QuotaGuard Static
To set up a Custom Domain, please keep in mind your subscription plan must be at the Micro level or above.
You also must have edit capabilities on your DNS records. (Although you can test locally by editing your own DNS settings, if you want.)
Once you have that plan enabled and edit access to your DNS records, please follow the directions below.
1) Log into the QuotaGuard Dashboard and go to the Setup section in top right menu.
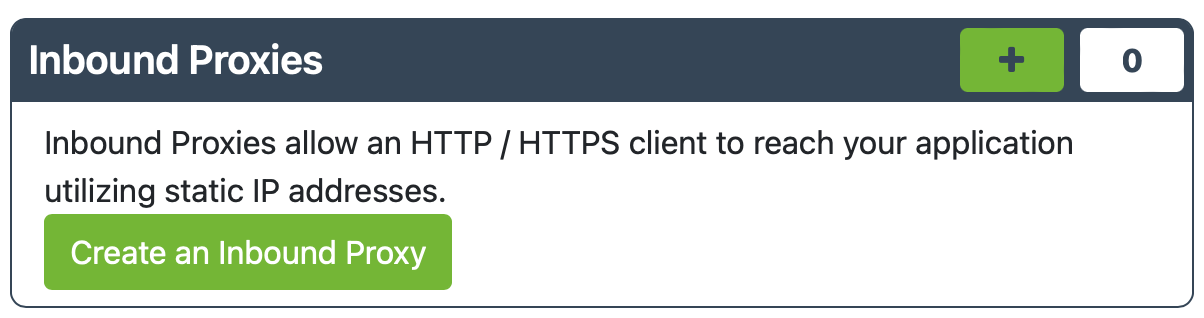
2) Click “Configure Inbound Proxies”. Then click on “Create an Inbound Proxy”.
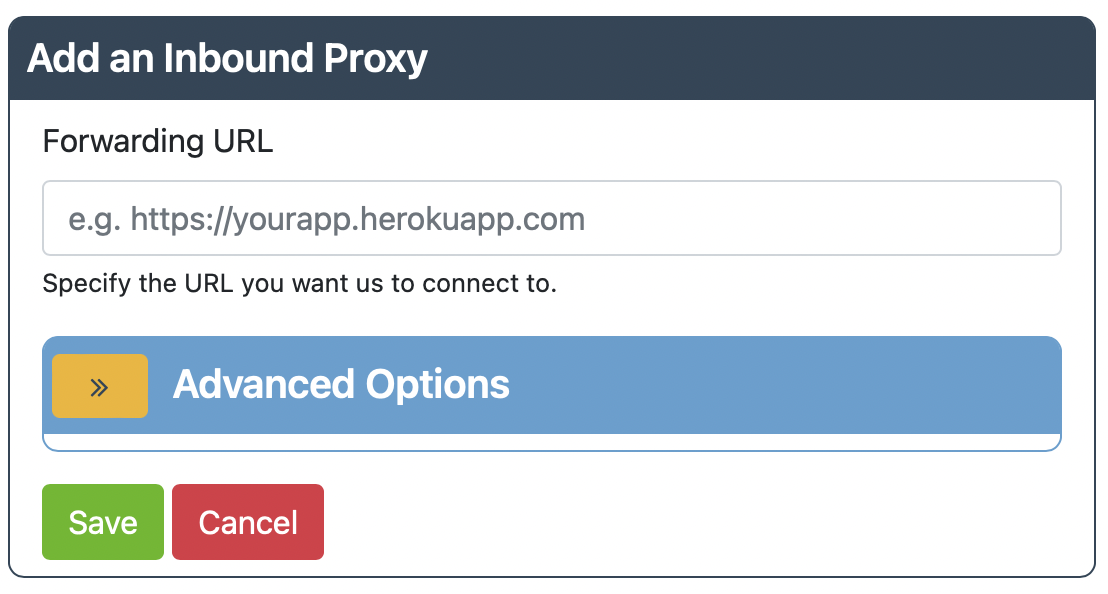
3) After entering the forwarding URL, and adjusting any of the Advanced Options that you desire, click “Save”
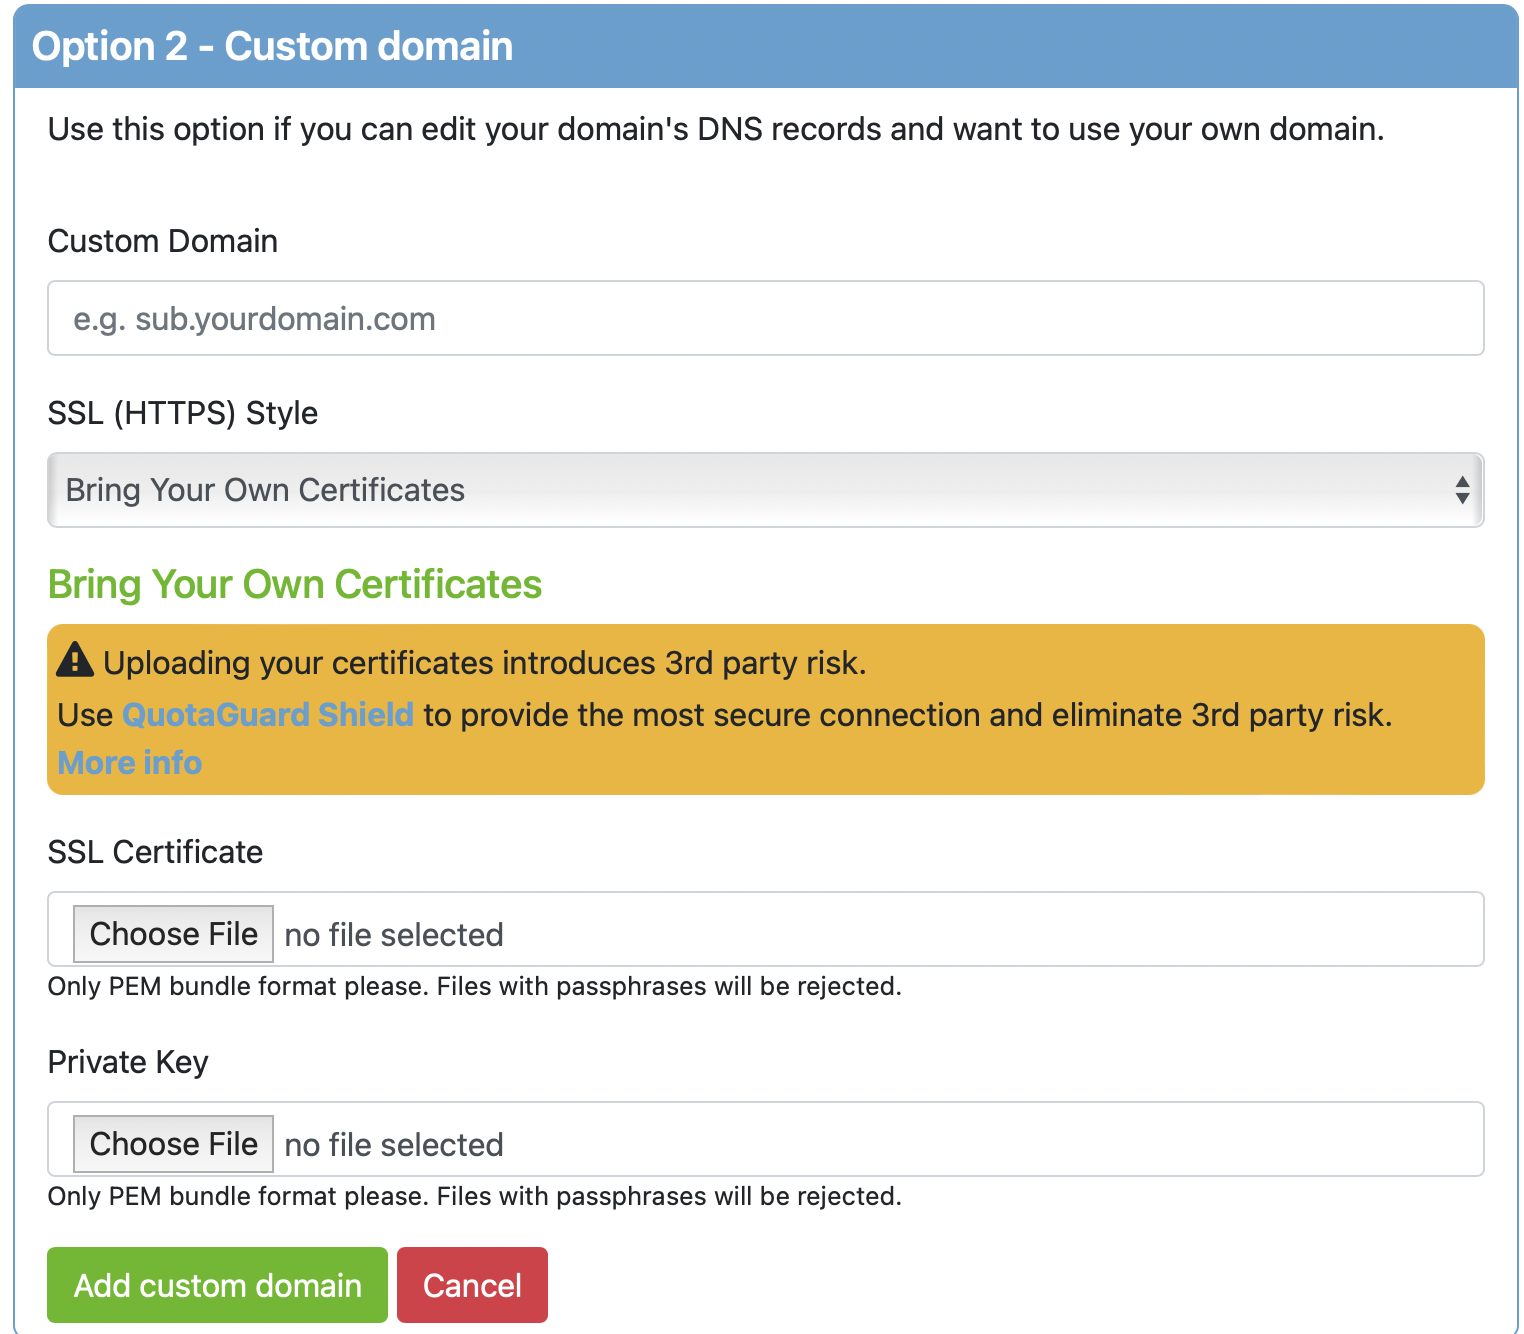
4) Select Option 2 Custom Domain and click on “I want to use my own domain”.

5) Fill in the Custom Domain and add your SSL certificates - if needed.
7) Important: To complete the setup you must create DNS CNAME records with your DNS provider with the details provided in the final setp.
You will need to add a CNAME record with your domain and the target URL.
Note: You can test locally without changing your global DNS by locally changing your DNS settings (ie: /etc/hosts in linux or OS X).
8) Once you click “OK, got it”, give us about 10 minutes for everything to propagate, so please be patient.
Last Notes
If you ever need to see these settings again, go to Setup Overview and you can review any configuration settings for each subscription.
Remember, you can’t access your IP’s directly as multiple applications are hosted on the same shared server.
Issues? Not seeing a it working? Contact us at Support, we’re here to help figure these things out with you.