How to Setup QG Inbound Proxy for QG Shield
Please Note: Inbound Proxies are available on Micro subscription plans and above.
Why Use an Inbound Proxy?
Cloud deployment environments such as Heroku, IBM Cloud, Microsoft Azure, GCP, etc allow you to horizontally scale your web application by creating multiple instances running on different servers and load balancing requests between them.
This is a problem if you need to access your web application via a specific IP address, for example if your corporate firewall can only allow traffic from a known IP addresses. With cloud environments, the IP address of your application may change at any time.
With QuotaGuard’s Inbound Proxy, we help you solve that problem. To allow for Inbound Static IP access, you can setup an Inbound proxy to define what URL you want traffic forwarded to so it can reach your designated web application.
Warning : This should NOT be used as a replacement for a DNS entry resolving a custom domain for a Heroku app. To access your Heroku app from a custom domain, please read the Heroku Custom Domains page.
Differences Between QuotaGuard Static vs. Shield and Inbound Proxies
QuotaGuard Static allows customers to choose whether they want a Custom Domain or to use QuotaGuard’s own domain (e.g. a62b1d0b4983db763450411fd393b3ce-eu-west-1.getstatica.com).
Some long-time customers might be wondering, “Sooo…how do I setup a Custom Domain with QuotaGuard Shield like I did with QuotaGuard Static?”
Because QuotaGuard Shield enforces certificates for each connection, the way in which those certificates are managed does not allow for QuotaGuard Shield customers to setup a custom domain using QuotaGuard’s own domain URL.
Therefore, don’t worry about setting up a custom domain when using QuotaGuard Shield, as it’s created for you during the Inbound Proxy setup process automatically.
Are you in the wrong place and need directions to setup an Inbound Proxy for QuotaGuard Static? Here are the directions for How to Setup an Inbound Proxy for QuotaGuard Static.
Getting Started
1) Create your QuotaGuard Account and choose a plan for QuotaGuard Shield at the Micro level or above.
If you need help deciding whether you want QuotaGuard Static or QuotaGuard Shield, please read our article What are the Differences between QuotaGuard Static and QuotaGuard Shield.
2) Log into the QuotaGuard Dashboard and go to the Manage Subscriptions section and locate the correct QG Shield subscription that you want to use for the Inbound Proxy setup.
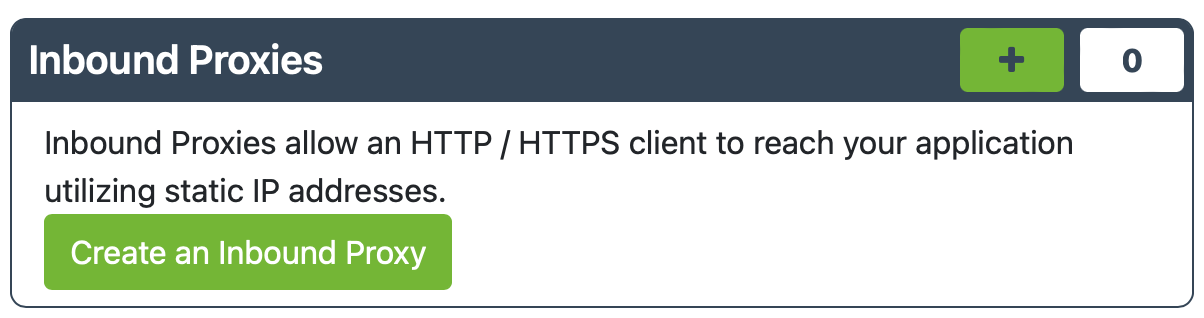
3) Click “Inbound Proxy / Configure Inbound Proxies”. Then click on “Create an Inbound Proxy”.
4) Enter the FQDN for the forwarding URL you want to use for the Inbound connection.
Also enter the application Forwarding URL where you want the inbound requests to be sent.
Note: Your URL must be HTTPS for QuotaGuard Shield, of course….
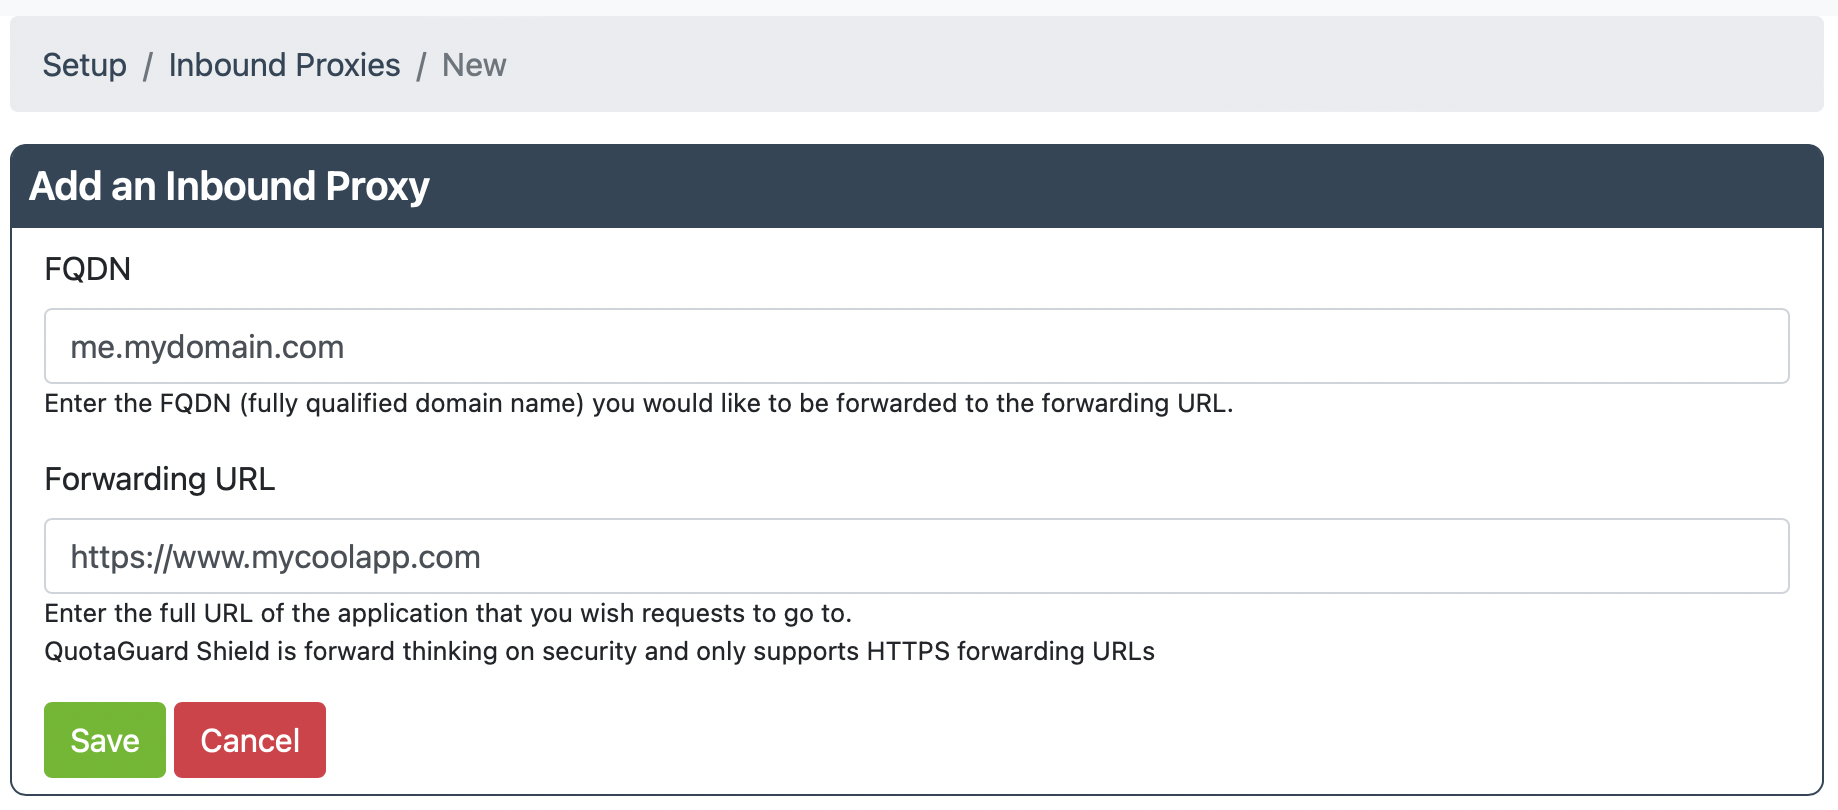
If you’ve done this before with QuotaGuard Static, you might be expecting some Advanced Options to be listed here. However, there are no Advanced Options available with Shield, so you can just hit Save and continue.
5) Follow the directions on the next page to create a DNS CNAME record with your DNS provider.
These directions correspond to your DNS A name record that resolves to two QuotaGuard Static IPs. You should include both IP addresses in any firewall rules or allow-lists, as the QuotaGuard load balancer may swap between the two IP addresses at any time.
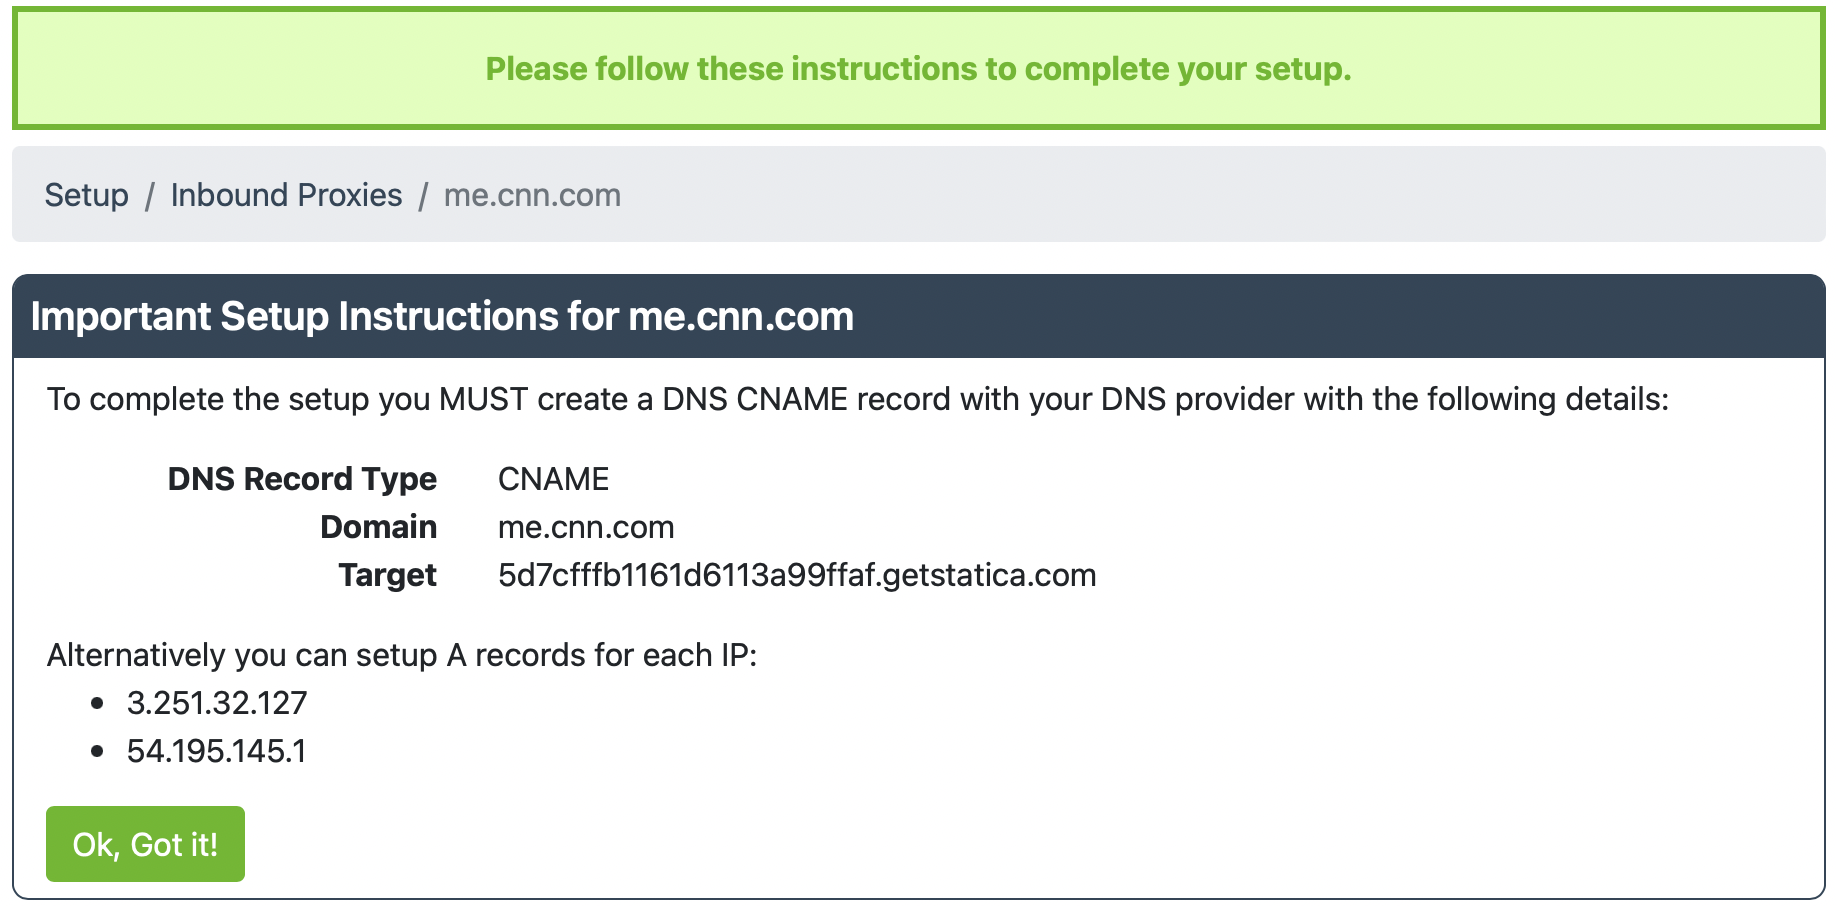
Once you’ve copied this information down, click “OK, Got it!”.
6) If you need to see the directions again, you can always select the correct subscriptions and go to Setup Inbound Proxies and click See setup instructions.
You can also edit the Inbound Proxy by clicking on the pencil icon in the upper right corner.
7) In your firewall, you should open access to the two QuotaGuard Static IPs in order for the Inbound requests to reach your cloud app.
This can be tricky to setup, so if you have questions, write us at Support so we can help get you up and running.
Happy Tunneling!